

The design I use is strictly geared towards what I find visually pleasing. I like the shape, it feels uncomplicated and appropriate our modern sense of design and living. That said I'm still governed by what the wood can do for me. You have to "listen to the wood". See where the prettiest patterns are, work around the knots and cracks and deliver the most bowl for the blank possible. My bowls will either emerge with a rounded side or a pretty straight side, I'm really not quite sure why it just seems to happen. This one is of the straight variety.

You can see in the photo on the right a large knot on the top side of the bowl that caused me some problems. When I first opened the blank it seemed to be clean and fit for carving. I lose about half the wood I season due to flaws like this that are apparent before carving. There are many reasons for this but the main ones are that I don't have the room to store large pieces of fresh cut green wood as many carvers and turners do. This storage ability gives the woodworker control over the conditions to which the wood is subject very shortly after the wood is felled. The sooner you seal the wood and place it in a stable environment the more likely you are to emerge with a successful blank. I have to rely on wood that has been sawn at a mill and may have been exposed to the elements. The fact that I loose some blanks only bothers me when it's a particularly nice piece of wood that I loose. I find many other things to do with this lost wood and visitors to my etsy store will see in the form of votive holders. This particular crack proved not to be a major issue as I was able to work it out of the final product.

Once the exterior has been defined it's time to bring the interior out to meet the exterior. When I started carving bowls I carved the opposite way. This came to a crashing stop when I found that after carving out the interior of a particularly nice piece of walnut the exterior had a flaw. The fact that the interior was already carved left me no wiggle room to correct the problem and much to my chagrin the entire piece and several hours work had to be discarded. It's still possible for the interior to pose a problem but this hasn't happened yet.

You can now see the bowl starting to take the familiar shape we all know and love. The vise you see in the picture is one I designed myself to hold bowls in place and be flexible for the many different stages of carving. It's made out of 2X2 oak which interlace to form a floating work surface that protrudes from the bench. After messing with clamps and such for a long time with little if any success this vision came to me as the elixir of all my carving problems. I'm quite proud of it for with the exception of sticking a little in very humid conditions it has been extremely successful.

The exterior and interior are then sanded and polished. This process has been made significantly easier with the addition of this flexible shaft from King Arthur's Tools. It has a chuck on the end of it that allow me to attach sanders and polishers and move them almost anywhere on the bowl. This flexibility means that a bowl can be finished quicker with far less irritation when it comes to getting a sander to a particularly hard to reach part of the bowl. Ye have to thank Julie, my wife, for this one as it was an anniversary gift.

The finished bowl is now ready to oil. Oiling makes the wood "come alive" as a friend describes it. It also seals the wood against damage from a variety of sources.
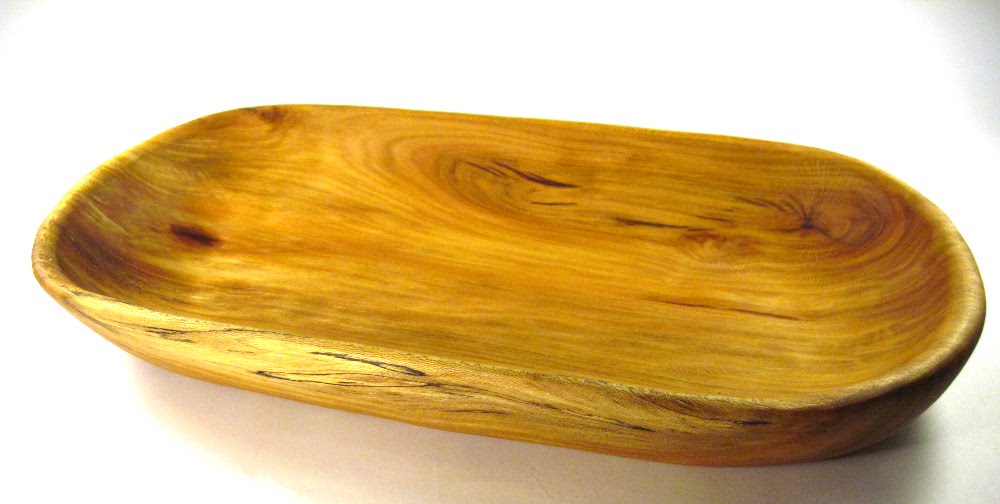 I use an organic tung oil from The Real Milk Paint Company. This oil is natural and food safe but is labor intensive to apply. It is however the best and most permanent natural finish to apply to a food safe bowl and is well worth the six weeks or so it takes to fully cure.
Now for this weeks other bowls!

This bowl is a large walnut dough bowl, 19X7X4

This is another large piece of walnut. 18X10X3
wow great work , very nice , love to walnut
ReplyDeleteBeautiful and informative - thanks for sharing!
ReplyDeleteThanks so much guys, glad you enjoyed it, Joe.
ReplyDeleteCool bowl!
ReplyDeleteAbsolutely gorgeous! Thank you for sharing the process. I've actually always wondered how it was done.
ReplyDeleteHi M.M.E., My process is actually pretty unique as I'm self taught, I can't vouch for other carvers but that's how I do it. Most bowls are carved on lathes, this means the carver can only produce a round bowl. This is too restrictive for me! All the best and thanks for viewing, Joe.
ReplyDelete